Showing posts with label Winter Preparation. Show all posts

Thursday, October 30, 2008

Cooler days perfect for planting garlic


Sunday, October 26, 2008 * By Nancy O’Donnell * Albany Times Union

Not quite ready to throw in the gardening towel for the season?

Try your hand at growing garlic. The optimum time to plant garlic is just around the corner, so there's still time to get prepared.
To grow your own, plant anytime from mid-October up until about five weeks before the ground freezes. Planting within the next few weeks takes advantage of the cooler soil and air temperatures, which are a catalyst for root development.

Once the ground freezes, the bulb will go dormant until spring, securely anchored in the soil throughout the winter. Come spring, the roots will be in place, ready and waiting to absorb nutrients and begin the growing season.

Begin preparing your soil by incorporating lots of organic matter -- compost, grass clippings and shredded leaves -- into the garden.

Garlic loves organically rich soil with excellent drainage. Provide full sun and a pH around 6.5 to 7.

When you buy garlic, it comes as a complete bulb. Separate it into individual cloves. Make a furrow about 2 inches deep, then plant cloves pointed end up and at least 6 to 8 inches apart.

Once covered, tamp and keep watered well until the ground freezes. Apply a 2-inch layer of mulch and leave until you harvest it next summer.

Monday, October 27, 2008

Late-fall garden tasks

From the Home Depot Garden Club:

Late-fall is a busy time in the garden. Northern gardeners are working to put their gardens to bed for the winter, while green thumbs in the South are cultivating cool-season gardens. Here's a to-do list to help keep your outdoor space looking great through autumn and winter — and to get a head start on spring.

In Northern climates (roughly to zone 6), now's the time to prepare your garden for its dormancy, and to protect your outdoor furniture from the elements. Divide the tasks over a few evenings and weekends so the work is less daunting. Use our handy checklist to keep you on track as you wind things down outside.

· Test garden soil pH and nutrient levels, using a do-it-yourself kit — and amend soil as required. · If you haven't already done so, spread mulch around trees, shrubs and perennials to insulate them through cold weather.
· Wrap tender trees and shrubs in burlap.
· Clean and oil gardening tools.
· Hose off and scrub pots with hot, soapy water and a bristled brush. Let them air-dry, then store in your garden or shed to prevent them from freezing and shattering in the cold.
· Bury potted trees and shrubs to insulate roots. Dig a deep hole or trench in a protected area and set the pot in. Top with soil and a layer of dry leaves.
· Lift and store dahlias, tuberous begonia, caladium, gladioli, etc.
· Disconnect and store seasonal water features. For year-round fishponds, you should have already stopped feeding your fish in early fall, or as soon as the temperature drops below 43°F. Now is also the time to remove any dead plant debris, install a bubbler for oxygen intake, and move delicate fish like butterfly koi and lionhead goldfish indoors. Cover your pond with a mesh screen to keep leaves and debris out.

Sunday, October 26, 2008

Putting the garden to bed....


Today is the last scheduled work day for our season until early Spring. This is the part of gardening that many forget to do. I didn't use cover crops or even mulch for years. There are some great posts on this blog from our darling Amy about the benefits of mulching and cover crops share many of the same. It is a great way to enrich the soil, leaving it ripe and ready when you need it in the Spring.

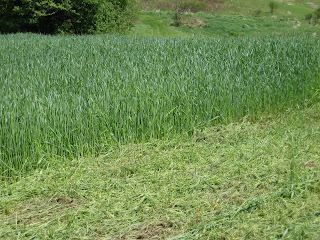
Last year we planted all garlic. That was a great crop since we could easily use it and also sold much of it at our Urban Farmers Market. This year we're also using Rye. Eric from Shepards Corner sold a large bag to us for $20 and it will be enough seed for several gardens throughout the University Area. Rye is great for Ohio, as it is tolerent of our cold winters...though as the weather has been going the past few years, who knows!? If you are an industrious person, you could also use it to make Rye bread.

If you read this post and want to stop by and get a bag of free seed, stop on by at The Weinland Park Community Garden, behind 303 E.6th St., Godman Guild, Cols, 43201---bring your own bag (BYOB...tee, hee) and it's first come, first serve. You could also meet some great people, share some gardening tips and have some fun. Below is a great article from Organic Gardening reviewing many cover crop choices:

By Erika Jensen
In This Article

Rodale's All-New Encyclopedia of Organic Gardening
The Easiest Cover Crops

Which cover crop is right for you? "You have to keep in mind the time of year and the species you are growing," says Diver. Some, such as cereal rye, are very cold-tolerant and work well for late-season plantings. Others, such as buckwheat, are very frost-tender. The cover crops listed here are widely adapted and can be grown in most areas of the United States, either as a summer or winter cover crop, depending on where you live.

Rye. This crop comes in two different types: annual rye and cereal rye. Both have their advantages. Sow cereal rye during the late summer or early fall, and it will grow until late in fall and resume growing in spring. With annual rye, which winter kills in USDA Plant Hardiness Zones 5 and colder, you'll be able to plant your garden earlier, since you won't have to turn the cover crop into the soil and then wait three weeks as you would with a perennial cover crop.

Field peas/oats. This dynamic duo combines the benefits of a legume (peas) that fixes nitrogen and a grain (oats) that contributes plenty of organic matter. And the plants have complementary growth habit—the peas climb right up the oats. Both crops are cold-tolerant, which makes this a good mixture to plant in late summer or early fall. In colder climates, they will also winter kill, allowing an early spring start.

Sorghum-sudangrass. As its name suggests, this grass is a cross between sorghum and sudangrass. This hybrid generates large amounts of organic matter and needs little encouragement to grow 5 to 12 feet tall. You can keep this frost-tender plant in check by mowing it down to 6 inches when it reaches a height of 3 feet or by planting it just seven weeks before frost.

Buckwheat. It's not wheat, and it's not a Little Rascals character! Buckwheat is a broadleaf plant and an excellent smother crop—it's effective even against weeds like quackgrass. "Buckwheat is very fast-growing and can provide a quick canopy to shade weeds. Just be careful to not let it go to seed, or you'll have buckwheat in your next crop," says Dr. Creamer. It matures in just six to eight weeks and can be squeezed in between spring and fall vegetable plantings. Buckwheat's white flowers serve two purposes—they work well as a filler for flower arrangements, and they attract beneficial insects.

Clover. Clover comes in a plethora of different shapes and sizes. White Dutch clover works well as a living mulch, since it tolerates both shade and traffic. Yellow blossom sweet clover is an excellent nutrient scavenger and helps build good soil structure. Crimson clover attracts beneficials and looks great, too. Whatever the color, clover fixes nitrogen and helps to build rich soils. For best results, make sure you inoculate your clover seed with Rhizobium bacteria (available from Peaceful Valley Farm Supply, 888-784-1722, http://www.groworganic.com/).

SOURCES The one drawback of cover-cropping for gardeners is that you may pay premiums for seed in small packages rather than a farmer's bulk seed prices. Check with your local farm supply store for seed- they may be willing to order varieties they don't normally carry. The following are mail order sources for untreated and certified organic cover crop seed:

Gathering a soil sample

Here is some information on testing your soil from the Home Depot Garden Club newsletter. I would use the extension service to analyze the sample, but I still find it helpful:


Collecting a soil sample is simple — though attention to detail is necessary.

Materials: Collect the following equipment and make sure everything is cleaned of previous soil: bucket, trowel or small shovel, small container (a recycled yogurt or margarine tub will do), newsprint.

In any given planting area, dig five holes that are six-to-eight inches in depth. (Conduct separate tests for vegetable patch, lawn, flowerbed, under rosebushes, etc.) Slide your trowel into the edge of a hole to remove a full-depth sliver of soil about a half-inch thick. Repeat for all holes.
Mix up the soil in the bucket, then spread it out to dry on the newsprint. Collect the soil in the pint container for testing.

Conduct soil test per package directions. Repeat for each garden section.

Testing your soil is easy. Amending it takes a little bit more effort but will provide dividends in the form of better vegetable and fruit yields, more profuse blooms, and a healthier, more thriving garden next year.

Soil solutions
So, your soil test results are in. Now what? Here's what to make of your results and the appropriate corrections.

RESULT: ACTION
High pH (alkaline soil): Mix sulfur into the soil.

Low pH (acidic soil): Mix lime into the soil thoroughly.

High nitrogen: Cut back on the plant food. Put plants on a water-only diet for a few months.

Low nitrogen: Add nitrogen-rich plant food per the manufacturer instructions.

High phosphorus: Cut back on phosphorus-rich fertilizer for a couple of years. "Use up" excess phosphorus by heavily planting the flowerbed.

Low phosphorus: Add bone meal or a superphosphate product, per manufacturer directions.

High potassium: Skip potassium-rich plant food blends for two years, and add a phosphorus- and nitrogen-rich plant food to balance out the soil a bit.

Low potassium: Mix in potash or wood ashes (except around plants that like acidic soil).